datasette-cluster-map by simonw
1,101 downloads this week Star
README source code


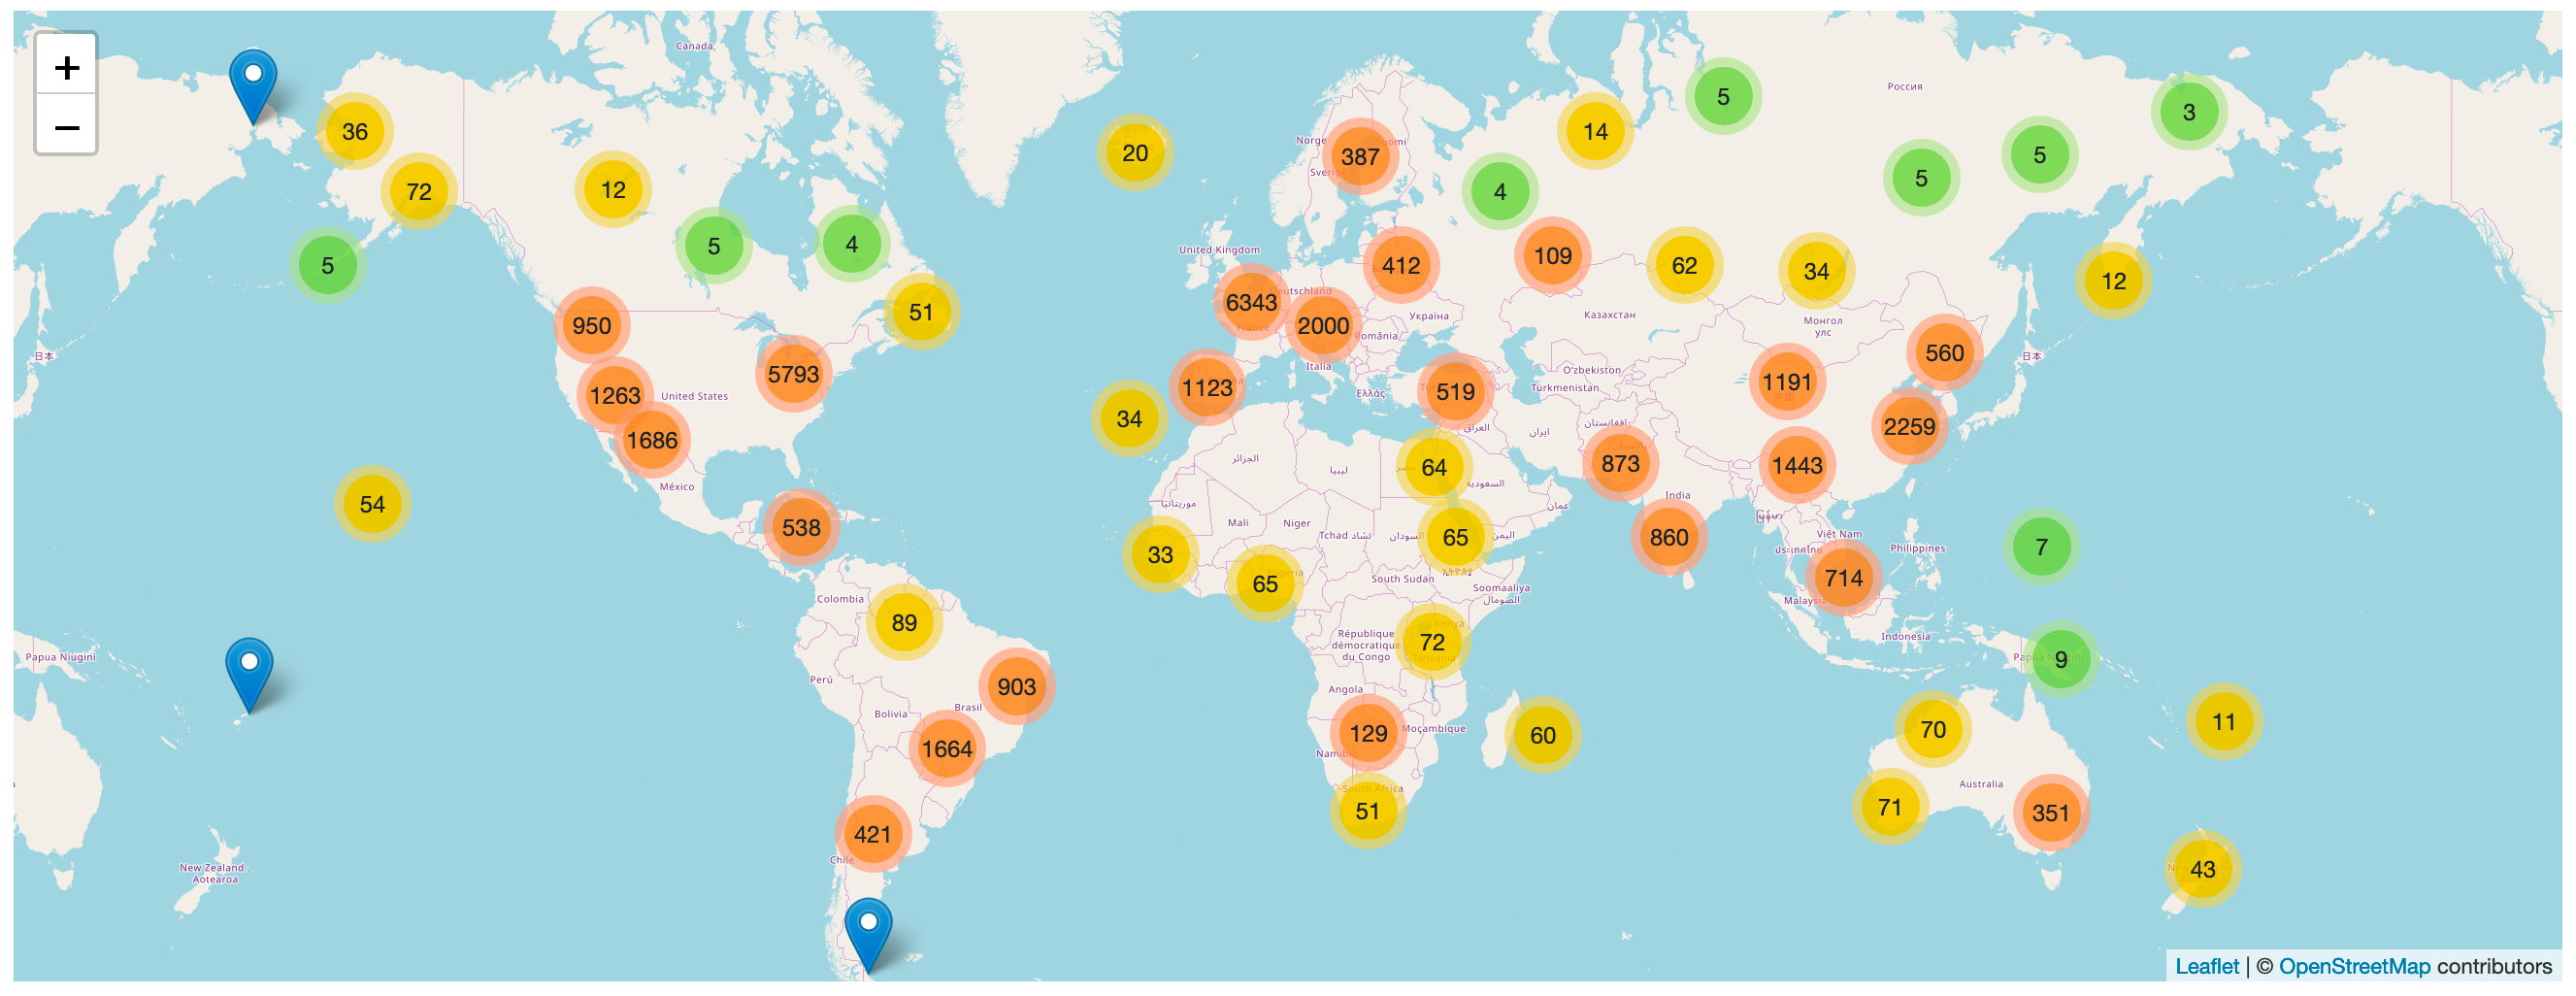
A Datasette plugin that detects tables with latitude and longitude columns and then plots them on a map using Leaflet.markercluster.
More about this project: Datasette plugins, and building a clustered map visualization.
global-power-plants.datasettes.com hosts a demo of this plugin running against a database of 33,000 power plants around the world.
Run datasette install datasette-cluster-map to add this plugin to your Datasette virtual environment. Datasette will automatically load the plugin if it is installed in this way.
If you are deploying using the datasette publish command you can use the --install option:
datasette publish cloudrun mydb.db --install=datasette-cluster-map
If any of your tables have one of the following pairs of columns a map will be automatically displayed:
-
latitudeandlongitude -
latandlng -
latandlon -
latandlong -
*_latitudeand*_longitude -
*_latand*_lngfor any of the three variants oflng
If your columns are called something else you can configure the column names using plugin configuration in a metadata.json file. For example, if all of your columns are called xlat and xlng you can create a metadata.json file like this:
{
    "title": "Regular metadata keys can go here too",
    "plugins": {
        "datasette-cluster-map": {
            "latitude_column": "xlat",
            "longitude_column": "xlng"
        }
    }
}
Then run Datasette like this:
datasette mydata.db -m metadata.json
This will configure the required column names for every database loaded by that Datasette instance.
If you want to customize the column names for just one table in one database, you can do something like this:
{
    "databases": {
        "polar-bears": {
            "tables": {
                "USGS_WC_eartag_deployments_2009-2011": {
                    "plugins": {
                        "datasette-cluster-map": {
                            "latitude_column": "Capture Latitude",
                            "longitude_column": "Capture Longitude"
                        }
                    }
                }
            }
        }
    }
}
You can also use a custom SQL query to rename those columns to latitude and longitude, for example:
select *,
    "Capture Latitude" as latitude,
    "Capture Longitude" as longitude
from [USGS_WC_eartag_deployments_2009-2011]
The map defaults to being displayed above the main results table on the page. You can use the "container" plugin setting to provide a CSS selector indicating an element that the map should be appended to instead.
You can customize the tile layer used by the maps using the tile_layer and tile_layer_options configuration settings. For example, to use the OpenTopoMap you can use these settings:
{
"plugins": {
"datasette-cluster-map": {
"tile_layer": "https://{s}.tile.opentopomap.org/{z}/{x}/{y}.png",
"tile_layer_options": {
"attribution": "Map data: © <a href='https://www.openstreetmap.org/copyright'>OpenStreetMap</a> contributors, <a href='http://viewfinderpanoramas.org'>SRTM</a> | Map style: © <a href='https://opentopomap.org'>OpenTopoMap</a> (<a href='https://creativecommons.org/licenses/by-sa/3.0/'>CC-BY-SA</a>)",
"maxZoom": 17
}
}
}
}If your tile server provides retina tiles, add "detectRetina": true to tile_layer_options to enable them.
The Leaflet Providers preview list has details of many other tile layers you can use.
The marker popup defaults to displaying the data for the underlying database row.
You can customize this by including a popup column in your results containing JSON that defines a more useful popup.
The JSON in the popup column should look something like this:
{
    "image": "https://niche-museums.imgix.net/dodgems.heic?w=800&h=400&fit=crop",
    "alt": "Dingles Fairground Heritage Centre",
    "title": "Dingles Fairground Heritage Centre",
    "description": "Home of the National Fairground Collection, Dingles has over 45,000 indoor square feet of vintage fairground rides... and you can go on them! Highlights include the last complete surviving and opera",
    "link": "/browse/museums/26"
}
Each of these columns is optional.
-
titleis the title to show at the top of the popup -
imageis the URL to an image to display in the popup -
altis the alt attribute to use for that image -
descriptionis a longer string of text to use as a description -
linkis a URL that the marker content should link to
You can use the SQLite json_object() function to construct this data dynamically as part of your SQL query. Here's an example:
select json_object(
  'image', photo_url || '?w=800&h=400&fit=crop',
  'title', name,
  'description', substr(description, 0, 200),
  'link', '/browse/museums/' || id
  ) as popup,
  latitude, longitude from museums
where id in (26, 27) order by id
Try that example here or take a look at this demo built using a SQL view.
datasette publish cloudrun global-power-plants.db \
    --service global-power-plants \
    --metadata metadata.json \
    --install=datasette-cluster-map \
    --extra-options="--config facet_time_limit_ms:1000"
To set up this plugin locally, first checkout the code. Then create a new virtual environment:
cd datasette-cluster-map
python3 -mvenv venv
source venv/bin/activate
Or if you are using pipenv:
pipenv shell
Now install the dependencies and tests:
pip install -e '.[test]'
To run the tests:
pytest