Using Datasette in GitHub Codespaces
GitHub Codespaces is a free tool from GitHub that gives you a full Linux development environment running in the cloud, accessed entirely through your browser.
It's a really neat way to get started with Datasette, in particular as a tool to build your own private Datasette instance and start using it to explore and analyze data.
Please note that Codespaces is not designed to host public websites. Any Datasette instances you create within a Codespace will only be accessible as private instances for your personal use.
This tutorial will show how to install and run Datasette in a Codespaces environment.
Step 1: Create a Codespace
Each Codespace needs to be attached to a GitHub repository.
You can use any of your existing repositories, or create a brand new one.
Or if you don't want to create your own repository you can use my simonw/codespaces-datasette repository instead.
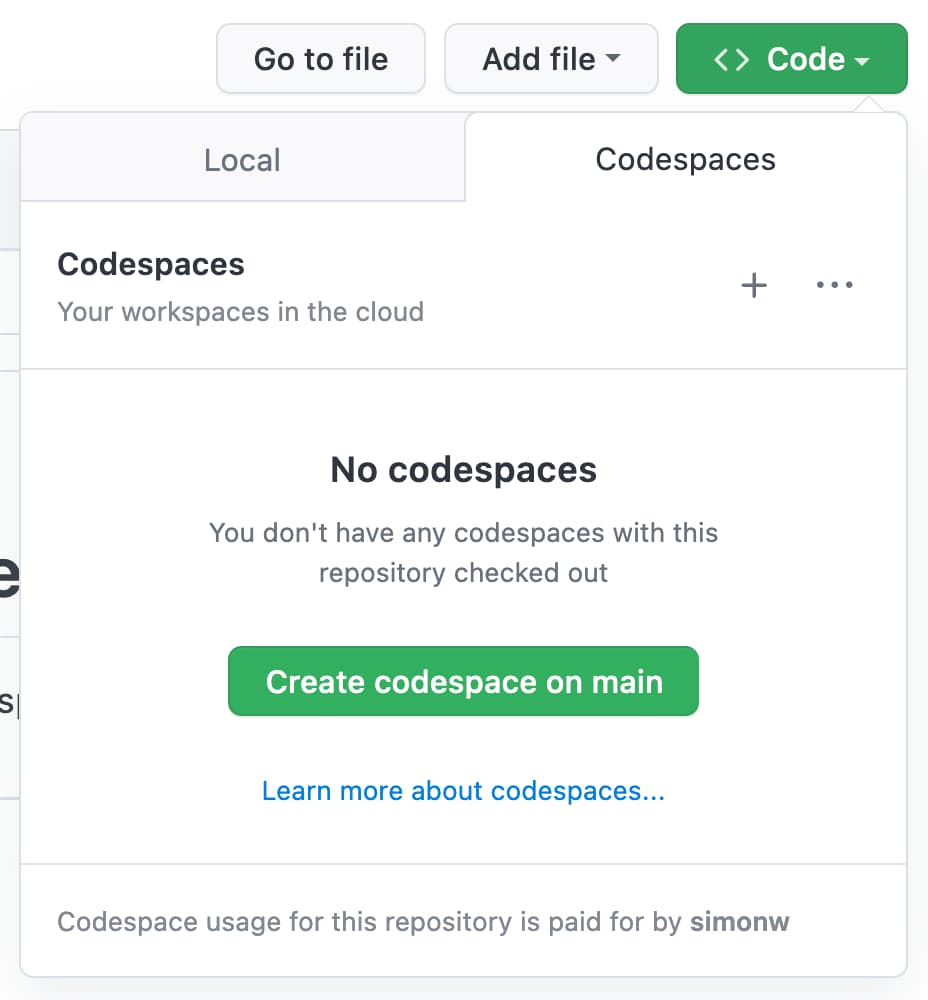
Use the "Code" button, select the "Codespaces" tab and then click "Create codespace on main" to start a new codespace.
After a short delay while the codespace starts running you should see an interface that looks like this:
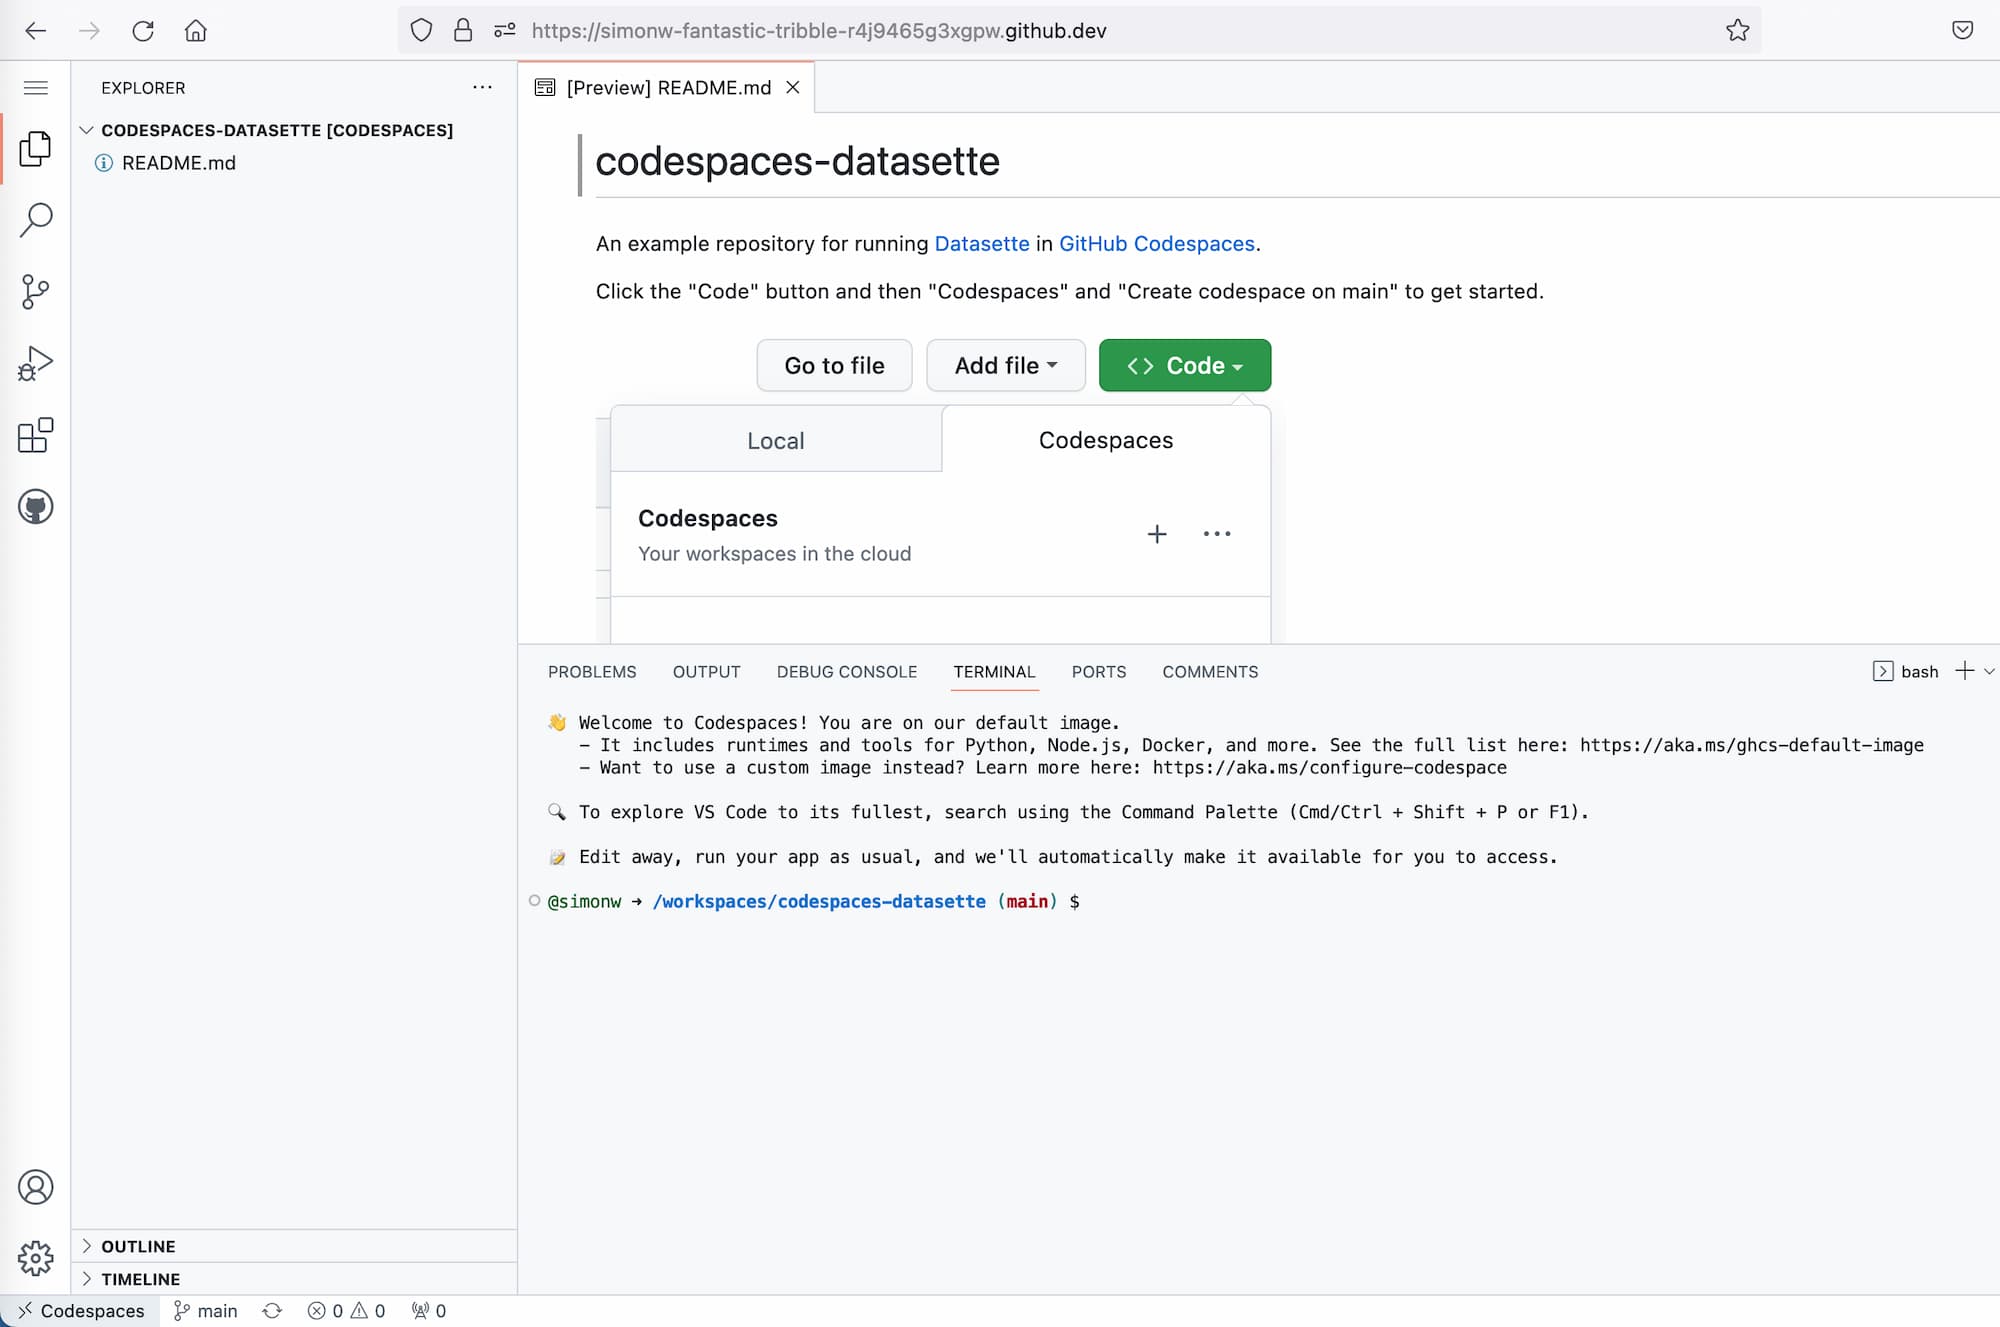
We will be working exclusively in the Terminal panel at the bottom of the page.
Step 2: Install Datasette
Before we can run Datasette, we need to install it. We can do that using the following command:
pipx install datasette
This will install Datasette using pipx, which ensures it is kept in its own separate environment where it can't clash with any other Python code you may decide to run in your codespace.
To confirm that Datasette has installed successfully, run this:
datasette --version
We also need to install a plugin:
datasette install datasette-codespaces
The datasette-codespaces plugin makes some small changes to Datasette to better run in the Codespaces environment. You can run Datasette without it but you may run into some frustrating issues, such as internal links not working correctly.
Step 3: Start Datasette
To start Datasette, run this command:
datasette data.db --create
This will start Datasette running against an empty SQLite database called data.db. If that database does not exist yet it will be created.
You should see the following:

Click that "Open in Browser" button to open the Datasette web interface in a new browser tab.
If you can't see that button, check to see if the "Ports" tab is available in the Codespaces interface. You can use that to connect to your Datasette instance instead.
Step 4: Import some data
Your Datasette interface will start with an empty database. Let's add some data to it!
We'll do that using the sqlite-utils command line tool.
We can leave Datasette running in the background by starting a new terminal. Click on the word "python" at the top of the terminal window and select "Split terminal":
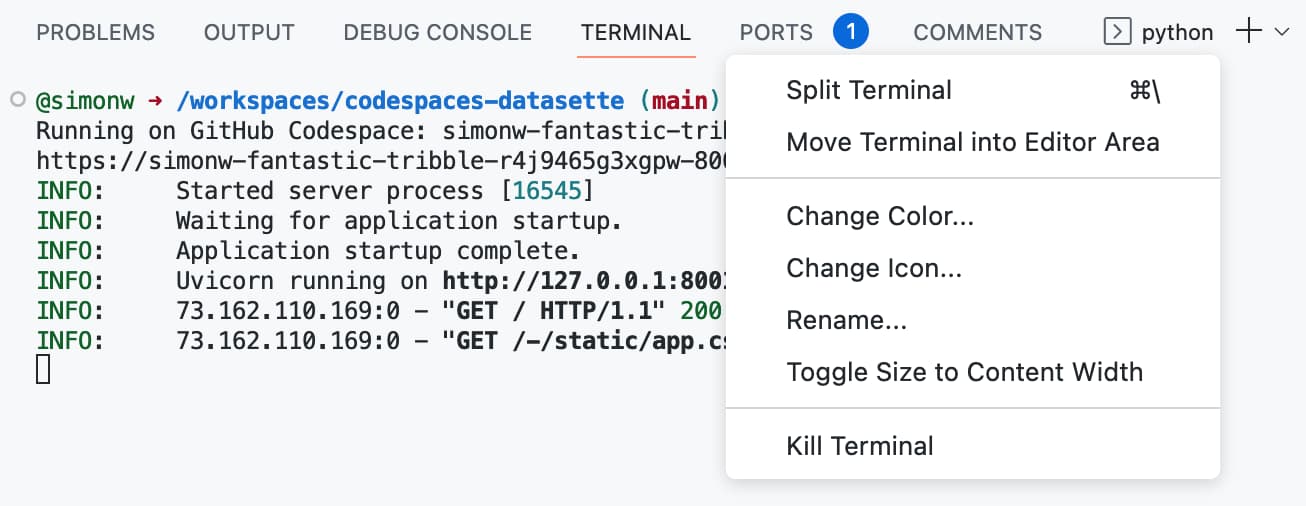
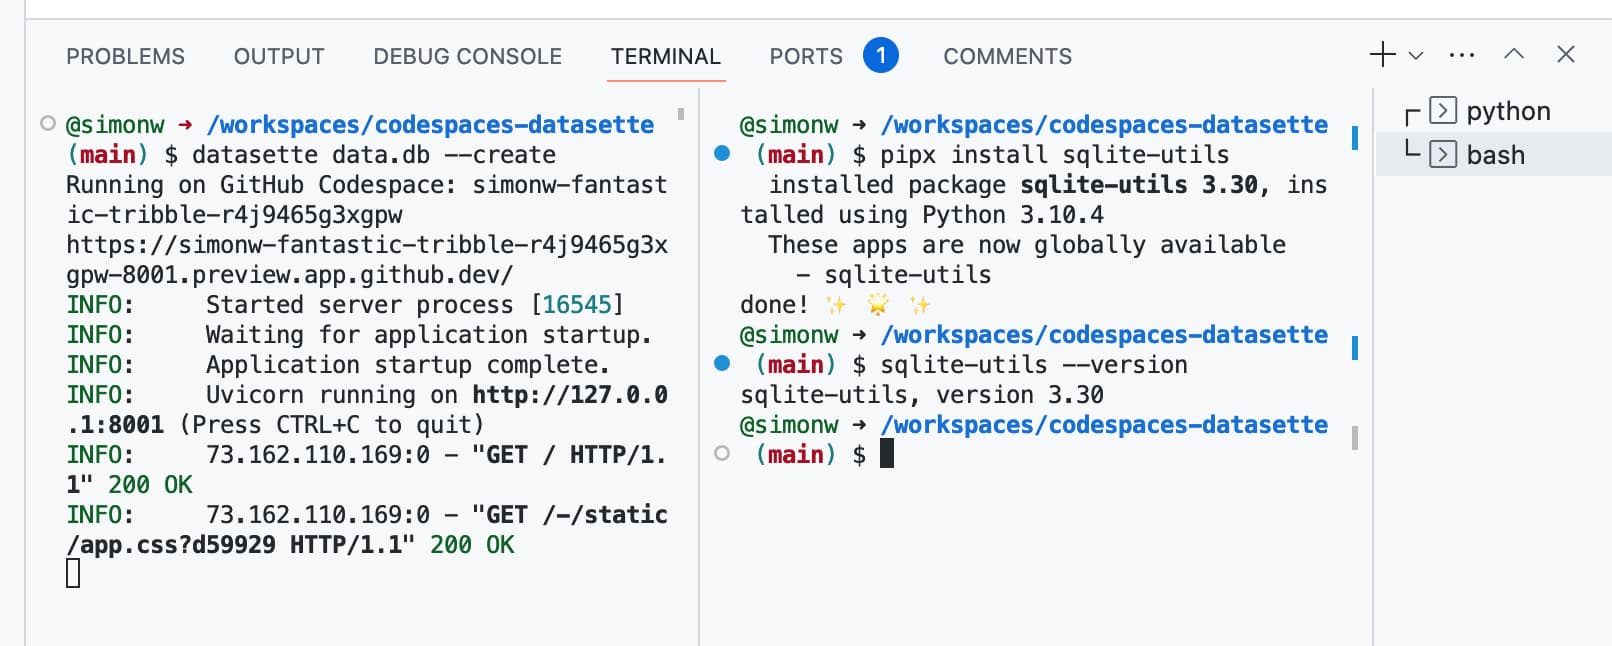
You should now have two terminal windows next to each other.
In the new terminal window, run this command to install sqlite-utils:
pipx install sqlite-utils
Then confirm installation with:
sqlite-utils --version
Let's fetch a CSV file from the web:
wget https://static.simonwillison.net/static/2022/Manatee_Carcass_Recovery_Locations_in_Florida.csv
And insert it into our database:
sqlite-utils insert data.db locations \
    Manatee_Carcass_Recovery_Locations_in_Florida.csv \
    --csv -d
This creates a new table called locations containing the data from that CSV file - manatee carcass recovery locations in Florida dating back to 1974.
The --csv option tells sqlite-utils to treat the file as a CSV file, and the -d option tells it to infer the column types from the data (rather than treating every column as a text column).
See the tutorial Cleaning data with sqlite-utils and Datasette for more about this example data.
Step 5: Install some more plugins
Datasette has over 100 available plugins, listed in the plugins directory.
To install these, we first need to stop the Datasette server running. To do this first click back on the terminal window running Datasette and then hit Ctrl+C to stop the server.
The datasette install ... command installs new plugins. Let's install a few of them:
datasette install \
  datasette-vega \
  datasette-cluster-map \
  datasette-copyable \
  datasette-configure-fts \
  datasette-edit-schema \
  datasette-upload-csvs
Here's what each of these plugins does:
- datasette-vega adds line, bar and scatter chart visualizations
- datasette-cluster-map adds a map visualization for any table with latitude and longitude columns
- datasette-copyable provides additional export options for copying and pasting data out of Datasette
- datasette-configure-fts helps you to configure full-text search for your tables
- datasette-edit-schema provides tools toedit the schema of your tables
Start the server running again like this:
datasette data.db
We don't need the --create option any more as we know the database already exists - although it won't break anything if we do include it.
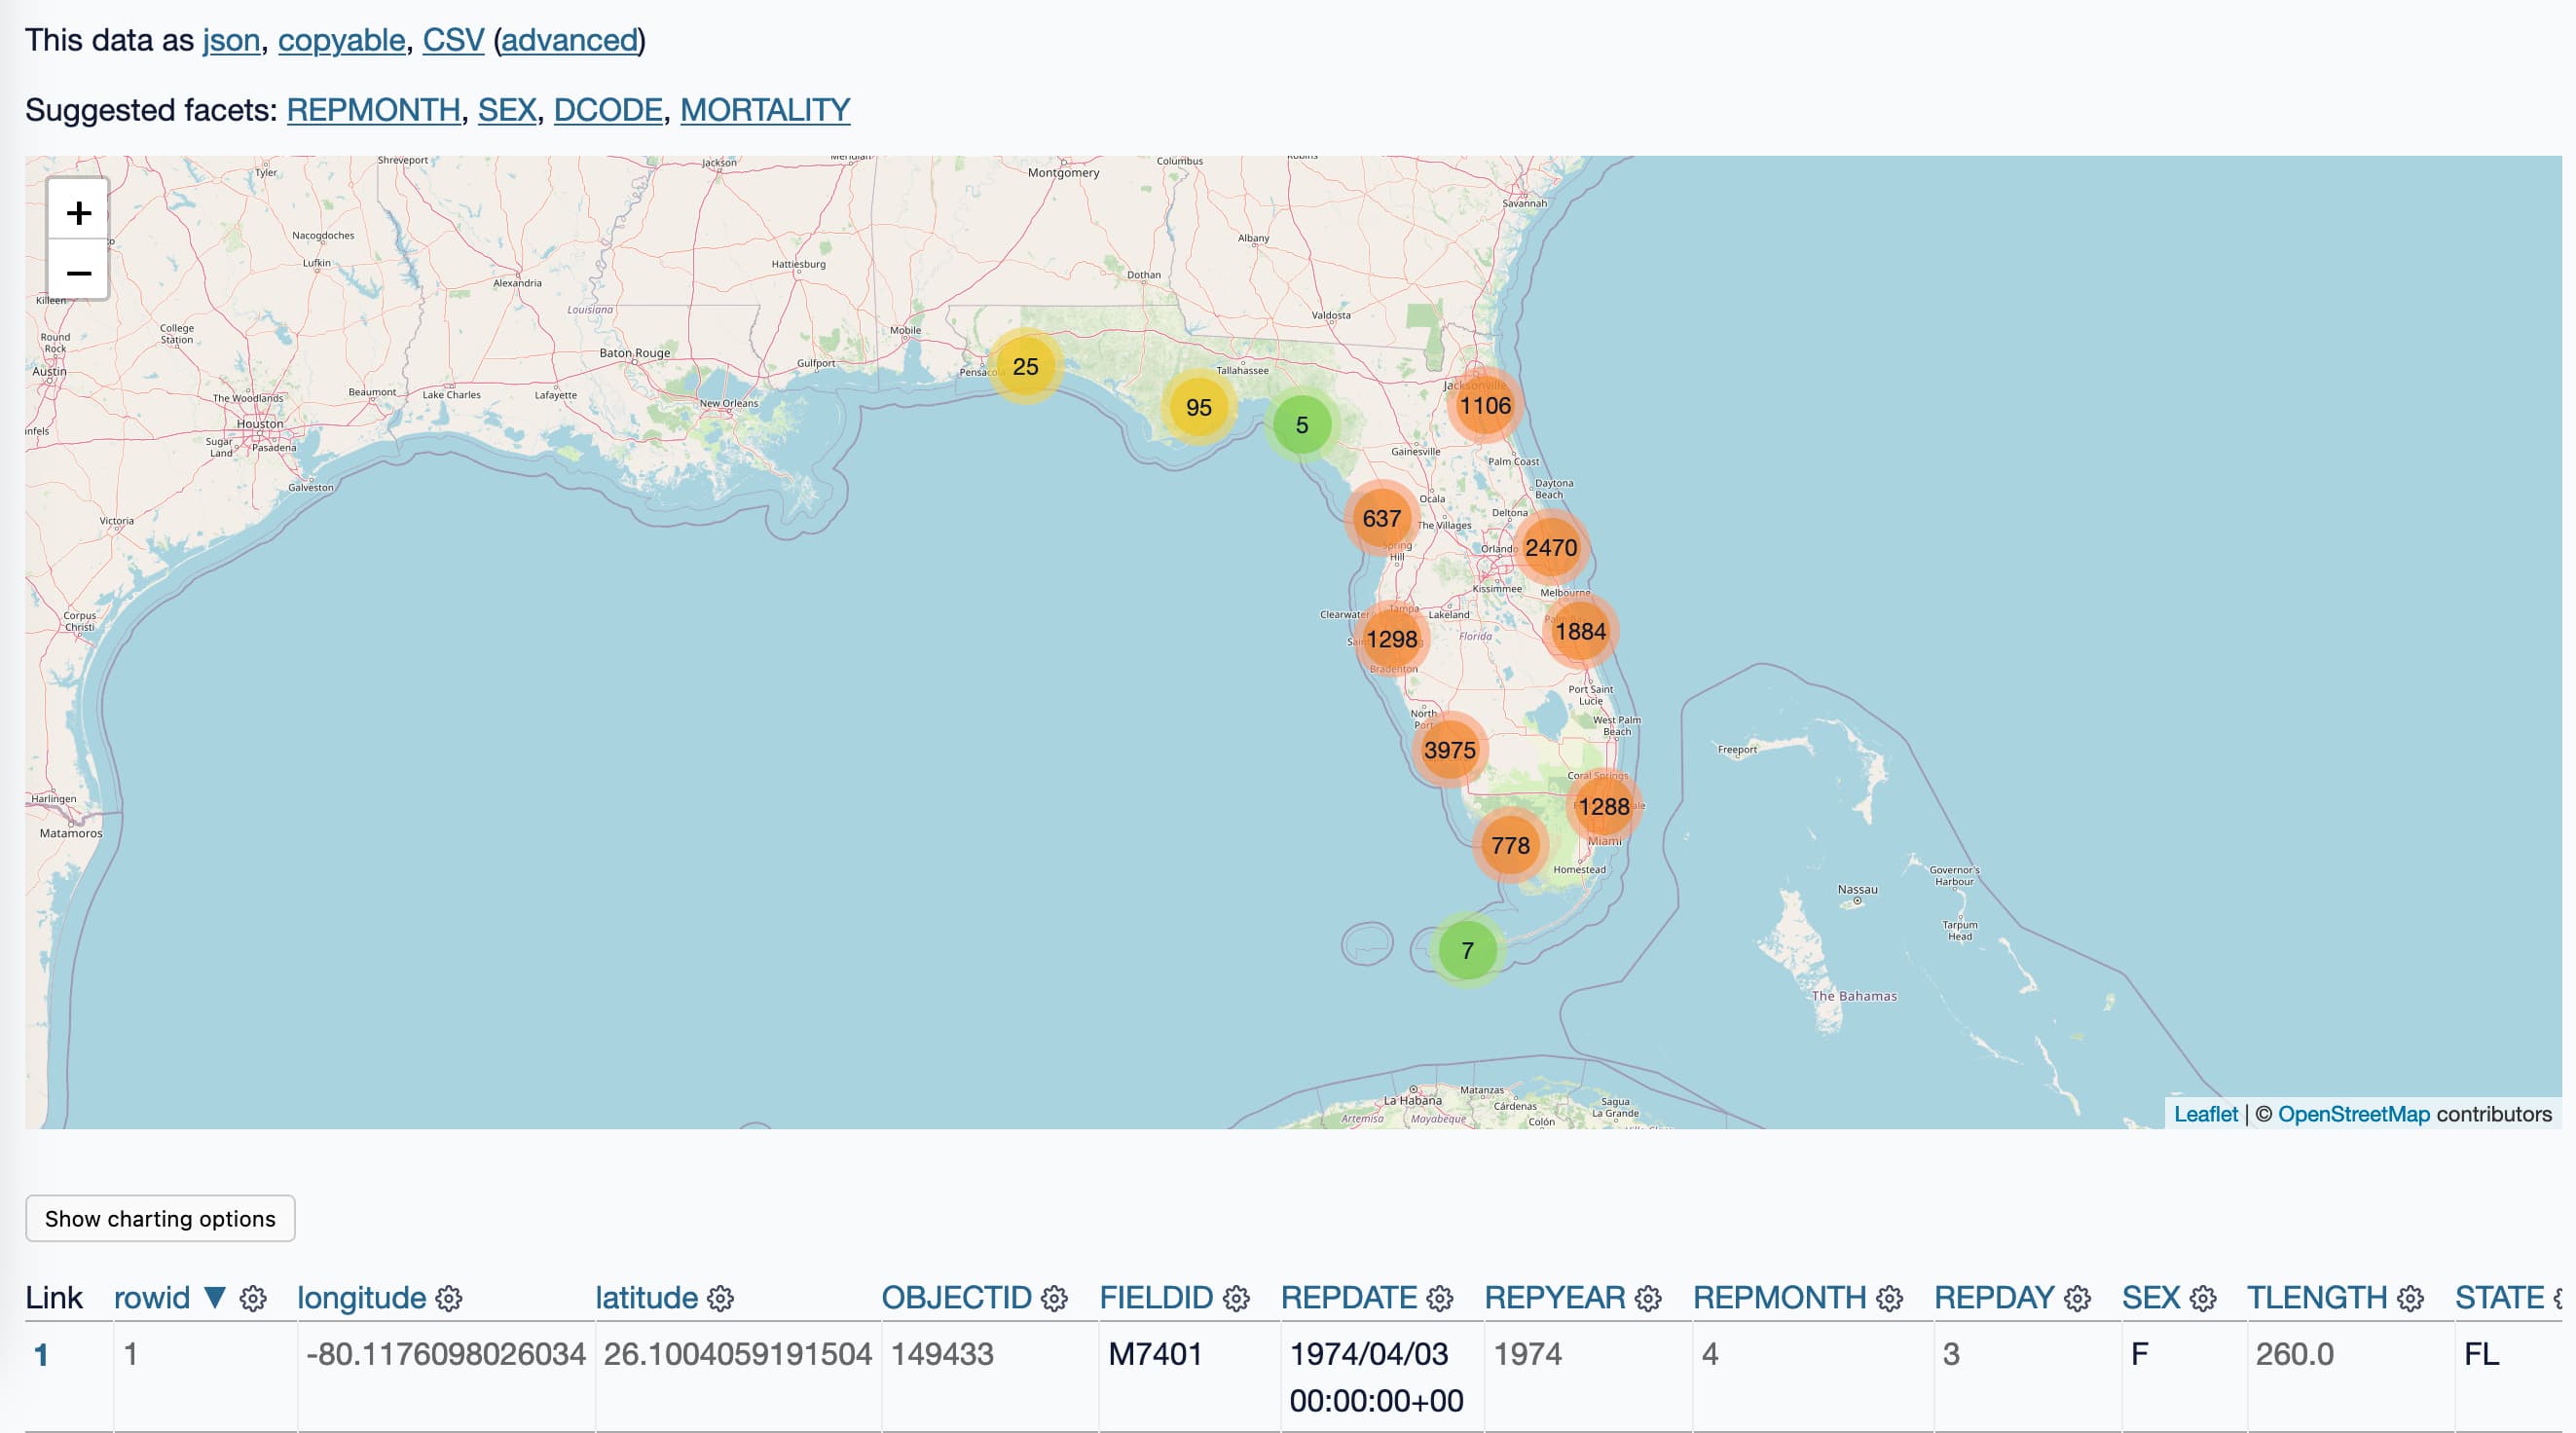
Step 6: Explore those manatee locations on a map
In Datasette, navigate to that "locations" table. It should have columns called X and Y which look like they might contain latitude and longitude data.
The datasette-cluster-map plugin can render these all on a map... but only if the columns have the names latitude and longitude.
We can use the datasette-edit-schema plugin to rename those columns.
Click on the cog icon at the top of the table, then select "Edit table schema".
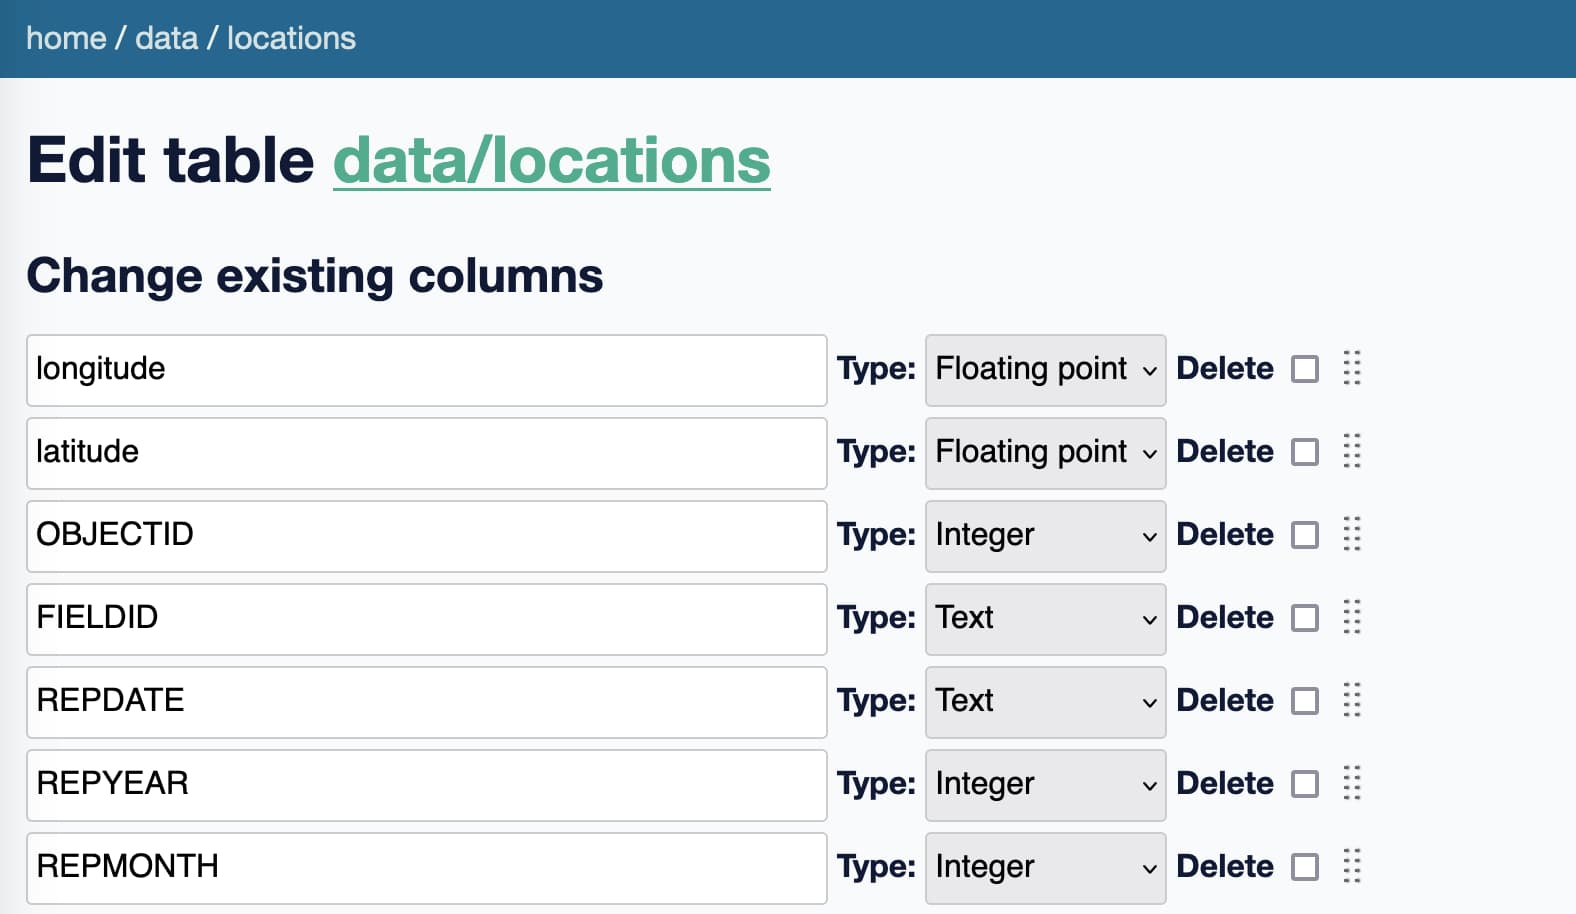
Rename the X and Y columns to longitude and latitude respectively, then click "Apply changes".
Return to the table page and you should see this map of Florida with manatee locations plotted on it:
Next steps
Try working through the rest of the Cleaning data with sqlite-utils and Datasette tutorial to learn more about how to use sqlite-utils and Datasette together.